Question 4.
Technologies Within Planning Stages
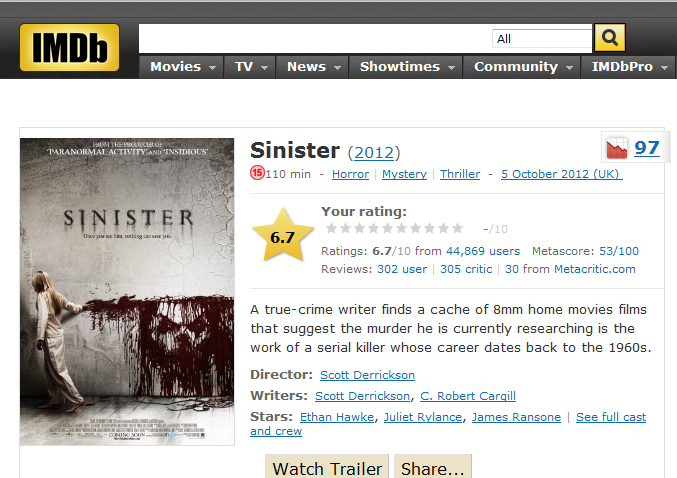
Screen Shot from IMDb - Internet Movie Database
We used sites like IMDb to look at films and there rating.
Films like Sinister (2012) we noticed had a similar idea to ours with the opening shots of the trailer being of a family moving into a new home.
This site was really helpful as we could search by genre and look at horror films that were fairly recent. There were options to look at the most recent and the most successful rated films. This was important as we could gage what horror films were doing well at the time of release.
The following mind map shows the technologies that we used within our Planning stages. These programs and softwares enabled us to create a unique powerpoint.
Technologies Within Planning Stages
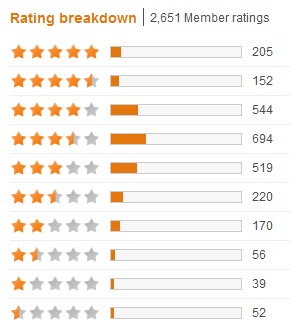
Screen Shot from LoveFilm of Ratings for Sinister (2012)
This is a screen shot from the website LoveFilm.
This site was really helpful as it showed us a detailed breakdown of each rating and how many votes the users had given to the film, in this case Sinister (2012).
This helped us develop our research we started with IMDb as we could use that site to see what ratings they were getting and go into further detail with LoveFilm which analyzed the ratings more.
Technology Within Construction Stages
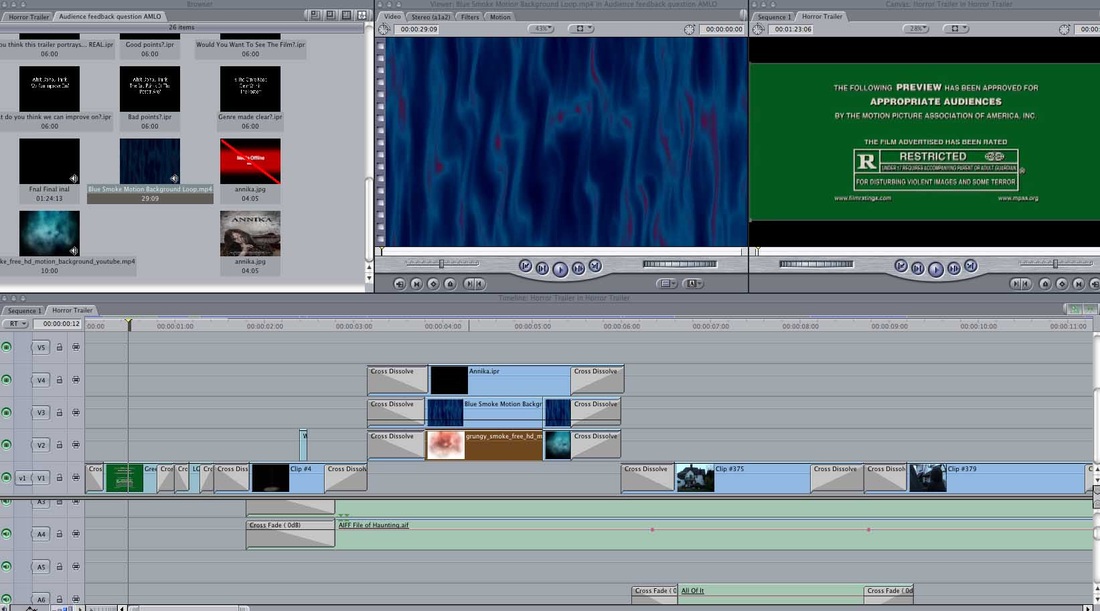
We used the Final Cut application to edit our horror trailer.
This software is really easy to cut shots and then overlay sound clips over the top of our trailer. This was extremely easy to both understand and to use. Once we had filmed all of our shots to produce our teaser trailer we then uploaded it all to Final Cut Pro and then selected the shots that were good enough to be included in our trailer.
We would first select the correct shot and the cut it down to size to then add onto the timeline of our trailer. Once they were cut down, we then dragged our shots onto the timeline at the bottom of the application then allows us to edit the various shots wether its adding in transitions or putting an overlay over the top to change the color of the shot. We included alot of cross fades, to add these, you selcect the end of a shot and hit command + T on the keyboard and then render the project when you are done. This then adds your cross fades
We found various soundtracks and imported them into our timeline. This then went onto the sound side of our timeline and we could edit it and cut it down from there. Placing different sound effects such as the symbol when Annika first appears was vital as it creates a tense and scary atmosphere for the audience that are watching.
Using Photoshop
This is a slideshow taking you through the steps of our process on photoshop. It shows you how we made our Poster from the beginning, using tools like the eraser tool, hue and saturation, burn tool and blood brushes.
Technologies Within Evaluation Stages
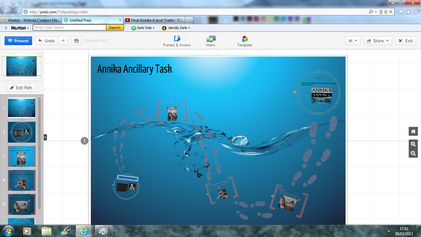
This is a screen shot of Prezi, which is a site where you can produce a presentation that shows information in a more interesting format.
This site allowed us to show our evaluation in a more entertaining form for our viewers. You simply follow the path and come across slides that fit together to show something, in this case brand identity. On Prezi you can insert videos, upload images, add text, and add audio to create this different form of presenting.
This site allowed us to show our evaluation in a more entertaining form for our viewers. You simply follow the path and come across slides that fit together to show something, in this case brand identity. On Prezi you can insert videos, upload images, add text, and add audio to create this different form of presenting.
Green Screening
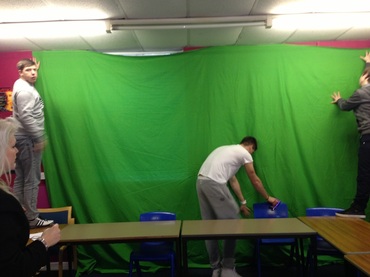
Green screening
We used green screen very effectively within our feedback for the three of our media products. Through actually pinning up the green screen and then editing out the green color on Final Cut Pro, we successfully used green screening to our advantage when portraying the feedback our audience gave us. Setting it up consisted of simply stapling the green sheet to a classroom wall and we then just started to film our feedback using a small questionnaire filled with questions on our three media products and then uploading all of the shots onto final cut pro.
We used green screen very effectively within our feedback for the three of our media products. Through actually pinning up the green screen and then editing out the green color on Final Cut Pro, we successfully used green screening to our advantage when portraying the feedback our audience gave us. Setting it up consisted of simply stapling the green sheet to a classroom wall and we then just started to film our feedback using a small questionnaire filled with questions on our three media products and then uploading all of the shots onto final cut pro.
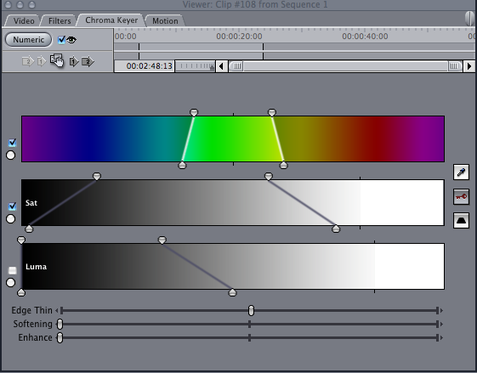
When editing it in Final Cut, we used the Chroma Keyer tool to select the right shade of green to dim it down for the computer to recognize. We were then able to play our trailer, include the poster or even the magazine front cover in the same shot as somebody giving feedback on our media products. We found this very effective as it looks so much better and flows smoothly. It also shows the feedback we have been given in a simple, easily understandable way. This the chroma keyer tool in final cut pro. Using this we were able to use green-screening. Once the tool is applied, you then select the green coloring until your shot goes black and you cant see anymore green. Next you just drag the shot you would like to play in the background over the top of your timeline so our shot would be our teaser trailer.
This Prezi shows the technologies we used within the evaluation stages. We used a range of slideshows, videos, mind maps, presentations to make our website interactive and technologically advanced to a 21st century standard.
